Welcome to the first part of the Zelda Game Club for Link’s Awakening. The Zelda Game CLub is where we play through Legend of Zelda games as a community, and we’ve made it to Link’s Awakening, the first entry from the Game Boy era of Zelda games. Today we’re going to go through the first three dungeons, plus talk about the people we met and the items we discovered. It’s a community playthrough so I’ll highlight community comments as we go, plus we’ll talk about the development history of the game too.
Before we get into it today, if you still want to join in the Zelda Game Club for Link’s Awakening, there’s still time! Part 2 will be out on Tuesday 4th April, therefore get your comments on this video about Dunegons 4, 5 and 6. Play to the end of Face Shrine, and then add your comments on this video by Monday 3rd April. If you’ve missed out on the Zelda Game Club for Link’s Awakening so far, no worries, there’s still time to join in.
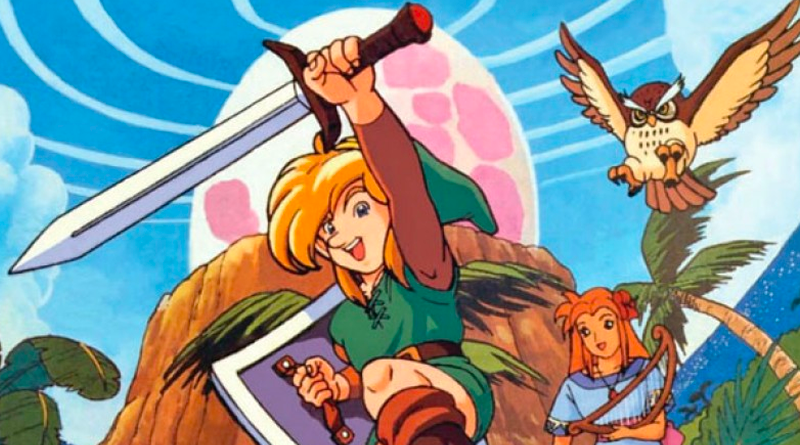
First of all, here’s a quick overview of Link’s Awakening. Originally this released in 1993 on the Game Boy, and it was the first handheld Legend of Zelda adventure. It was also the first Zelda game not to take place in Hyrule, and it doesn’t feature Princess Zelda or the Triforce. Instead of the usual set up Link is on Koholint Island and his objective is to wake the Wind Fish, to allow him to escape the mystical island.
OK, let’s dive into the game.
Much like A Link To The Past, we find ourself waking up in a bed, although this time it’s in unfamiliar surroundings. Our first job is to get our Sword and Shield, and lucky for us Tarin has our shield. Therefore we wake up, speak to Tarin, grab the shield and off we go. We have to head to the left and then down, out of the town and towards the sea. Along the shore we’ll find our sword, but be careful for the creatures on the beach, they can cause us some damage.
We find our Sword, but we’re interrupted by an Owl. He’s going to be our navigator throughout our adventure, giving us little hints and tips along the way, as well as help us fill int he gaps as to why we’re here, and what our objective is. After we find our Sword, we travel north to the Mysterious Forest. Off we go north, through Mabe Village and enter the forest, and we’re met by our Owl friend. Our next objective is to find a key, which is going to help us get into our first dungeon, Tail Cave.
Mysterious Forest
The Mysterious Forest is a puzzle, and you’re not going to be able to get the key until interact with the raccoon. This isn’t just any raccoon, he’s magic and he’s stopping your progress, so we have to find a way to stop his magic. He tells us his nose is sensitive, so taking that as a clue, we have to find something. There’s a toadstool in the forest, we need to pick that up and take that to thre Witches Hut, which can be found east of the forest. Once we give the toadstool to the Witch, she’ll mix us up some magic powder. Magic powder is useful, you can light torches, plus you can sprinkle it on items for interesting results, similar to A Link To The Past. Now we have the powder, then return to the raccoon and sprinkle some on his nose. The magic is broken, and it’s Tarin who’s been put under a spell. After helping Tarin, get the Tail Key from the chest.
Master Knight DH
“There is an aspect that is obvious in LA transitioning from LTTP: technology limitations affecting gameplay. To the game’s credit, it does allow for assigning items to multiple buttons, which Link to the Past was missing and would have actively benefited from with its 20 equippable items. Of course, to accomplish this, the Sword is treated as an equippable item, and the same goes for the Shield as well, which has to actually be held out to be working and also slows down Link when it is held out as well. This is still a straight upgrade from the NES Zeldas, but in comparison to LTTP, the most painful part is a lack of an Action button. To handle actions such as grabbing or dashing, equippable items have to be used. This starts being obvious as soon as the Power Bracelet is obtained, and while switching onto the menu to momentarily swap on the Action item for its abrupt task is thankfully not too tame, it IS worth mention.”
Thanks for the comment Master Knight. This is very noticeable, especially when picking up items. I noted this in the second dungeon when you are constantly bumping into pots, and getting the pop up saying you can’t pick up this item just yet. While the technology limitations must have been interesting from a development point of view and the team at Nintendo, it’s striking when moving from ALTTP to Link’s Awakening. Most of the time it’s not too jarring, but it would have been good to have some built in functions, like the power bracelet being used all the time. The effect of this is you spend a lot of time in the menus for Link’s Awakening.
Trading Items
Before we make our way to the first dungeon, we can start the item trading, which is a big long sequence of items found in Link’s Awakening. The Trading sequence is required for later parts of the game, so getting this done early can save time later. First of all, we want to make our way to a house southeast in Mabe Village, and it contains something called the Trendy Game. It’s a game where you have a crane arm, and by controlling with A and B you can pick up items. You want to get the Yoshi Doll from the middle, this is our first item in the trading sequence.
Next we can head north of the Village and enter a house, and we want to give the Yoshi Doll to the mother with the baby and in return she’ll give you the Ribbon. Once we have the Ribbon, head to the house with the chain chomp outside and enter the building to the right, and give the Ribbon to CiaoCiao, she’ll give you the Dog Food. Finally, for now, head down to the beach again and enter the house with an Alligator named Sale, give him the Dog Food and he’ll give you the Bananas.
Now we’ve completed the first part of the trading game, we can go to the first dungeon, Tail Cave.
Master Knight DH
“We do get a good item out of the deal soon enough: Roc’s Feather, the dungeon item of the first dungeon. This provides Link with a burst mobility option that he was still more or less missing in LTTP. Now Link can jump around and that provides evasion capability at a moment’s notice. Not only that, but he can do jumping spin attacks for swift and powerful attacking. This improves the game’s flow especially when the blasted Zirros are showing up as early as the Kanalet Castle area. By and far, I find the Roc’s Feather to be the best of the first 3 dungeon items, the other 2 being stuff that would be Action Items in LTTP as they practically are there anyway.”
Roc’s Feather definitely is a good item, it was something new for the series up until this point. I can be jarring coming from ALTTP to Link’s Awakening, especially with items like the Power Bracelet and Pegasus Boots, which were simply equipped all the time in ALTTP. Definitely agree on the mobility side of things with Link and his movement.
Tail Cave (Dungeon)
Tail Cave is our introduction to Dungeons, and is therefore fairly straight forward. There are some new enemies in here called Hardhat Beetles, which you have to use your sheild to bash them, turn them over to reveal their belly and then kill them. We have our traditional map, compass and item, plus we have a new mechanic in Dungeons in Link’s Awakening, the Stone Beak, which gives us hints and tips along the way. There is a unqiue mechanic in this Dungeon, where you have to whack enemies and match the symbols on their chests, matching either diamonds, hearts, clubs or spades.
The unqiue item in this dungeon is Roc’s Feather, which allows us to jump over holes in the ground. As always, it’s useful in the Dungeon you find it in, allowing you to progress in the dungeon, as well as giving you an advantage against the boss, plus it’ll allow you to explore the overworld too. We’re also introduce to 2D sidecrolling sections of the game, which is similar to Zelda II. We also meet Goombas in the Zelda franchise for the first time. Earlier we saw chain chomps, now we’re seeing Goombas, it all adds to the strangeness of this island.
Before we get to the boss we have to find the Nightmare Key. This allows us to get to Moldorm, the worm-like boss. Use the Roc’s Feather to jump out of the way, and try not to get hit by him because he’ll knock you off the edge, or damage you and you’ll die. Moldorm’s main weakness is his tail, so jump out of the way, or block him with your shield and focus on damaging the tail. Once you hit that a few times you’ll defeat him, pick up the heart container then get your first Instrument of the Siren, The Full Moon Cello.
Journey to Bottle Grotto
After Tail Cave has been beaten it’s time to set off again on our journey to Bottle Grotto, although we have a few tasks along the way. Once we leave Tail Cave, the Owl says he’s so glad we’re real, and we have to collect 7 more instruments to wake The Wind Fish. He then directs us to Goponga Swamp.
Once you have finished having a chat with the Owl, head back to Mabe Village and the two boys outside the library will run to you and say BowWow has been kidnapped by Moblins. Make your way to the house and have a chat with Madam MeowMeow and she’s not in a good way, asking you to save BowWow.
Next up we want to head back into the Mysterious Forest, go north and exit north east and you’ll find a heart piece that previously we couldn’t get, but now we have Roc’s Feather we can get that. Continue north east and you’ll find the Moblin Lair.
Moblin Lair
Here we have a mini dungeon with a few rooms, and we have to defeat the Moblins before reaching the boss. The boss is invincible until he runs at you, you have to dodge out the way so he whacks the wall, and when he’s stunned you can land damaging sword blows on him. Use Roc’s Feather to jump out the way a few times and get him to run at you, dodge, hit and repeat until he’s defeated. You’ll find the dognapped BowWow at the back of the cave.
Goponga Swamp
Rather than going straight back to Madam MeowMeow’s house with BowBow, you want to head to the next Dungeon because BowWow is key to getting in, as he eats the plants in the swamp that help you access the next Dunegon. Make your way back into the forest, and this time go north west. Exit the forest and then head east into Goponga Swamp. Then use BowWow to clear the enemies and the plants to help you get into Bottle Grotto Dungeon.
Bottle Grotto
Our second dungeon is a little longer than the first one, and slightly more complex. This dungeon introduces a new mechanic for Link’s Awakening so far, but one that Zelda fans will recognise from A Link To The Past, the switch block. We have a familiar items such as compass, map, and the stone beak. You’ll likely notice around the Dungeon there are heavy pots and items, and I found running into these items was all too easy, and actually a little bit annoying. This is related to the item in Bottle Grotto, The Power Bracelet. You’lll need to equip the bracelet to pick up heavy items like pots.
Bottle Grotto also introduces a new enemy type called Mask-Mimic. They are very similar, if not the same to Shy Guys, and you can’t attack them from the front. The best way to deal with them is to charge up your sword, and move around them and attack them in the back.
In the middle of the Dungeon there’s a good battle with a Hinox, an emeny we’d get to know very well in Breath of the Wild, but it’s good to see an early design of a Hinox here.
There is a stand out puzzle in this dungeon, which did have me stumped for a little while. There’s a room with a Pols Voice, Stalfos and a Keese Bat. You have to defeat them in a particular order, and you can find this out by speaking to the stone bird statue. Once you enter the room, move the blocks, throw a pot at the Pols Voice, then kill the keese and then the Stalfos to get the key. It’s easy when you know how, but first time I did this I wasn’t sure how to solve it.
Once we have the Power Bracelet and the Nightmare Key, it’s time to face off against The Genie, the boss for the Dungeon. There are a couple of phases to the boss fight. First the Genie jumps out and tries to attack, then pops back in the bottle. You want to avoid his attacks until he goes in the bottle, then throw the bottle against the wall. Do this a couple of times and the bottle with break. Then for phase two, try to avoid the Genie’s attacks, and slash at him with your sword until he’s defeated. Once finished pick uo the heart container, and then go into the other room to find The Conch Horn.
Master Knight DH
“The gameplay is working as far as when the game was made goes, especially with Link’s sword range not being a (symbols) butter knife, but the balance absolutely shows its age. Moldorm being the first boss, being fought in an arena where there isn’t that much room to work with, and dealing 1 Heart per hit at a point where you wouldn’t even have collected 4 Heart Pieces makes him a problem right away even with the Roc’s Feather, the only thing keeping him tolerable is how fragile he is with only 2 spin attacks at least bringing him down, and even then the speedup still happens after each hit, the Turns Red for the last HP that the second spin attack at least bypasses merely making the speedup permanent.
It doesn’t even help that Link’s deterrent attack has actively received hit lag, which at least checks how overbuffed Link’s sword range is, but against Moldorm, it is so easy to simply be bounced off of the arena when charging up a spin attack. Genie and Slime Eyes don’t compare to this when you know what you’re doing. Genie’s fireballs are more scary than anything but overall just get baited and his teleportation isn’t too bad to shake off, and Slime Eyes isn’t much harder to figure out with his final phase being shockingly fragile.”
Good point here, the bosses do seem slightly inconsistent in difficulty. Personally, I really liked the Genie fight, not because it was tough, but for the way it used the mechanics of the dungeon item, throwing the bottle against the wall, that was great. Slime Eyes again, introducing that mechanic with snapping the slime in half with the Pegasus Boots was pretty cool, and inventive given the platform the the timing of the game in the early 90s.
Journey to Key Cavern
We’ve completed Bottle Grotto, now it’s onto Key Cavern, but there’s a few things we can do before we get there. First of all we need to get 200 rupees to buy the shovel from Mabe Village. There are a few areas around the exit of Bottle Grotto where you can get rupees, but once you have 200 then it’s back to Mabe Village and buy the Shovel from the store. It’s a good idea to pick up some bombs too, plus you can also get the bow. You can steal the Bow too, however, if you do that and go back into the shop, then the shopkeeper will kill you, and you’ll forever be referred to as ‘Theif’ rather than your selected name.
Richard’s Villa
Now we have the shovel we camn start making our way to the next Dungeon, Key Cavern. First of all though, we have to get the key. From Mabe Village, you want to head East and when you reach the warp portal, go down. You’ll find the entrance to Key Cavern here, but we don’t yet have the key. Keep going down and you’ll come across Richard’s Villa. Go inside and havea chat with Richard, and he’ll explain how he once lived in a lavish castle, but he had to escape because his servants turned against him. Richard tasks you with retrieving 5 Golden Leaves, then he’ll tell you where the key is for Key Cavern.
Kanalet Castle
After you have spoken to Richard you’ll want to head east from Richard’s Villa, then north east, and you’ll reach Kanalet Castle. The front gate is shut, so keep going east and you’ll come across Kiki the Monkey. Hopefully by now you’ll have started the trading game. If not, then you’ll have to double back and pick up a few items. We need the bananas to give to Kiki to help us open the gate.
- Get the Yoshi Doll from the Trendy Game.
Trade the Yoshi Doll to Mamasha at the north end of Mabe Village to get the Ribbon. - Trade the Ribbon to the small chain chomp in the dog house of Madam MeowMeow’s house in Mabe Village to get the Dog Food.
- Trade the Dog Food to Sale, located in the lone house at Toronbo Shores, near where Link first acquired his sword. Sale will give Link the Bananas.
Now you have the bananas, give them to Kiki and his monkey friends will come out of the trees and build a bridge, to help you get over the river. Kiki will also leave you a stick, which is the latest item in the trading sequence that runs throughout the game.
Go ove the bridge and you’ll come to a bush infront of a statue, slash at the bush with your sword to reveal a hidden staircase. Go down there, and use Roc’s Feather to get across the gaps. Once you’re inside the grounds of the castle, head west and you’ll find a Darknut. Kill them, and then you’ll come to a screen with crow in a tree. Throw a rock at the crow and he’ll fly out of the tree, and you’ll want to quickly kill it, this will reveal the first golden leaf.
Next, make your way to the right of the castle and you’ll find the mad bomber, he’s an enemy who hides in holes and throws bombs at you. You’ll want to keep a close eye on the holes and slash your sword at the bomber when he pokes his head up. Defeat him and you’ll get the second gold leaf.
Then make your way to the front of the castle and enter. Defeat the Darknuts and Zol and you;ll get the third leaf. For the next one you will need some bombs, you can find these under pots but you can also buy them in Mabe Village. You are looking for an area with two mad bomber symbols on the wall, bomb them and enemies will appear. Defeat them and you’ll get a golden leaf.
Finally, exit the castle and come back in through the other door. There’s a tough enemy called a ball and chain trooper, defeat him and you’ll get the final golden leaf.
Trading Sequence Item 6 – Honeycomb
Now you have the Golden Leaves you can make your way back to Richard’s Villa, however, you can carry on the trading sequence at this point. Head back towards Mabe Village and you’ll find Tarin standing next to a tree. Give Tarin the stick and they will knock the beehive out of the tree with the stick. After being chased by bees you’ll get the honeycomb.
Slime Key
Once you’ve done that then it’s time to go back to Richard and hand over the 5 golden leaves. Richard is pretty pleased and shows you the entrance to the stairs, and he says your reward is there. Take the path to the right and you’ll end up in pot hole field. You want to find a path through the bushes and the holes, make your way to the Owl statue and dig a hole with the shovel in front of the statue. This is where you find the slime key. Make your way back to the Key Cavern entrance above Richards Villa, open the gate, and then make your way back to Pothol field and jump over the gap with Roc’s Feather to get in.
Key Cavern
Key Cavern gets its name from all the keys you get in this dungeon. There are 1 too many keys in the whole dungeon, which can be useful. The dungeon follows a similar formula to others – map, compass, stone beak and item. The item here in this dungeon are the Pegasus Boots, allowing Link to dash. There’s a good mid-dungeon boss battle with Dodongo Snakes, and they are damaged using bombs, so it’s a good idea to stock up on bombs before going into this dungeon, as they will not only come in use for mini-boss battles, but also cracks in the wall too.
Slime eyes is the boss in this dungeon. This big blob taunts you saying you can’t see it, so what you need to do is run into the wall using the pegasus boots, and this will knock him down. Slash at the eye with your sword. The blob starts to separate, and when it’s just about to split, run at it with the pegasus boots and it will separate into 2 parts. Dodge out of the way and slash at the eyes to do damage to the boss. Hit each eye 4 times, and you’ll defeat Slime Eyes. Pick up the heart container and then get the Sea Lily’s Bell.
Development
Link’s Awakening started life as a side project, with programmer Kazuaki Morita creating a Zelda-like on a Game Boy dev kit. Staff at Nintendo Entertainment Analysis & Development division then joined in and they created something similar to an “after school club”. After A Link To The Past released in 1991, the team asked permission to start development on the first Zelda title for the Game Boy, and the team wanted to try and port A Link To The Past to the new platform. Many of the original team from ALTTP came back together to work on Link’s Awakening.
ALTTP writer Kensuke Tanabe joined the team and started working on the script. Takashi Tezuka wanted to make Link’s Awakening a spin off title, which is why it features Mario and Kirby characters like Chain Chomps and Goombas. Tezuka specifically asked Tanabe to leave out Princess Zelda, Hyrule and the Triforce. Tanabe then came up with the idea for Kholint Island, with the Egg on the mountain.
Yoshiaki Koizumi, who worked on the plot for ALTTP came in to work on the story. Koizumi developed the plot for Link’s Awakening, and fleshed out the dream-like world and the interaction with the strange villagers. Eiji Aonuma describes Link’s Awakening as the first Zelda game with a proper story and attribites much of that to the character development of the people you meet throughout the island.
In an interview about the evolution of the Zelda series, Aonuma called Link’s Awakening the “quintessential isometric Zelda game”. At another time, he stated that, had the game not come after A Link to the Past, Ocarina of Time would have been very different. Tezuka said that he prefers the game over A Link to the Past, as he enjoyed the challenge of making a similar game on lower-specced hardware.
Several elements from Link’s Awakening were re-used in later Zelda titles; for example, programmer Morita created a fishing minigame that reappeared in Ocarina of Time, among others. Tanabe implemented a trading sequence; Tezuka compared it to the Japanese Straw Millionaire folktale, in which someone trades up from a piece of straw to something of greater value. This concept also appeared in most sequels.
That’s it for Link’s Awakening Part 1. Part 2 will be out on Tuesday 4th April, therefore get your comments on this video about Dunegons 4, 5 and 6. Play to the end of Face Shrine, and then add your comments on this video by Monday 3rd April. If you have missed out on everything so far, there’s still time to join in.
Leave a Reply